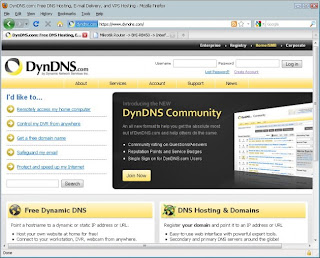
The following tutorials;
1. to take advantage of IP Public Dynamic and Static especially from Telkom Speedy so it can be used for our web server IP.
2. to use public IP for our web server Domain with Free Domain.
3. to monitor Dimanis Public IP that we get from Telkom Speedy or other ISPs so that we can access our network from the outside with ease.
4. to take advantage of IP Public Dimanis we get from Telkom Speedy or other ISPs so that we can utilize and access the VPN with ease through the Fre Domain Name which we get from dyndns. That means we do not bother looking for IP Public Identity that we have, simply by accessing the just our Domain Name.
the way
1. Registration Perform at DynDNS like the steps below:

If this is the Public IP Modem Router ADL then if xp.solution.blogdns.com of access to the WebBrowser will display a setting image ADSL Modem Router.
If the Public IP: 125.164.75.150 is using dialup Mikrotik PPPoE, then the hostname xp.solution.blogdns.com can be used as identification for remote access to tsb pake mikrotik Winbox and Webbox.
If the Public IP: 125.164.75.150 This is Portforwarding into a Webserver XAMPP, so if the hostname is accessible from the webbrowser xp.solution.blogdns.com will display the view we have created web server. For example in the next step is how to make Webserver Portforwarding.
9. Install XAMPP on our PC and place the design of our websites to the folder C: \ xampp \ htdocs. (eg our PCs Local IP is 192.168.88.200).
10. After that we make sure our web server is functioning correctly by accessing our Websites from Webrowser to IP 192.168.88.200, appears as below:.
11. Next we set Portforwarding on our ADSL modem router to forward port 80 on our PC to the IP address of 192.168.88.200 earlier.
12. Okey, all settings have been completed we do and the last step is to see the results by accessing our Hosts. WebBrowser. If still not convinced, we can ask other friends (who may also outside our LAN network area to access the Hostname that we created earlier)
enjoy it :))
1. to take advantage of IP Public Dynamic and Static especially from Telkom Speedy so it can be used for our web server IP.
2. to use public IP for our web server Domain with Free Domain.
3. to monitor Dimanis Public IP that we get from Telkom Speedy or other ISPs so that we can access our network from the outside with ease.
4. to take advantage of IP Public Dimanis we get from Telkom Speedy or other ISPs so that we can utilize and access the VPN with ease through the Fre Domain Name which we get from dyndns. That means we do not bother looking for IP Public Identity that we have, simply by accessing the just our Domain Name.
the way
1. Registration Perform at DynDNS like the steps below:

3. Enter the Hostname name we want, and we can see from our ADSL Modem Status.
4. Next we select the feature or service that we will use and then click "Add New Chart"5. Next we click "Next", here we see that our Free Charge and get up to 5 FREE Domain Name Host name.
6. Okey, register at DynDNS Hostname has been completed we made ..
7. Install Dynamic DNS Updater and running on one PC in your LAN network, may also on your PC with XAMPP web server. What is important to have access the internet because this is an application that will tell us about the DynDNS account that we have the Public IP.
http://cdn.dyndns.com/windows/DynUpSetup.exe
8. Okey, until here we have to perform Updating Public IP to DynDNS and then we can enable further. It means "If our access to the Hosts xp.solution.blogdns.com DynDNS will then be automatically directed to the Public IP: 125.164.75.150.http://cdn.dyndns.com/windows/DynUpSetup.exe
If this is the Public IP Modem Router ADL then if xp.solution.blogdns.com of access to the WebBrowser will display a setting image ADSL Modem Router.
If the Public IP: 125.164.75.150 is using dialup Mikrotik PPPoE, then the hostname xp.solution.blogdns.com can be used as identification for remote access to tsb pake mikrotik Winbox and Webbox.
If the Public IP: 125.164.75.150 This is Portforwarding into a Webserver XAMPP, so if the hostname is accessible from the webbrowser xp.solution.blogdns.com will display the view we have created web server. For example in the next step is how to make Webserver Portforwarding.
9. Install XAMPP on our PC and place the design of our websites to the folder C: \ xampp \ htdocs. (eg our PCs Local IP is 192.168.88.200).
10. After that we make sure our web server is functioning correctly by accessing our Websites from Webrowser to IP 192.168.88.200, appears as below:.
11. Next we set Portforwarding on our ADSL modem router to forward port 80 on our PC to the IP address of 192.168.88.200 earlier.
12. Okey, all settings have been completed we do and the last step is to see the results by accessing our Hosts. WebBrowser. If still not convinced, we can ask other friends (who may also outside our LAN network area to access the Hostname that we created earlier)
enjoy it :))


0 Komentar untuk "Make web server with dynamic public ip via DynDNS"